Citrix Client Installation
Table of contents
When using your Anatomy device
If you use a device managed by Anatomy IT, the Citrix Workspace app is already installed and can be used immediately.
If you want to use the Citrix Workspace app outside of West Europe, then a special VPN client must be provided by us in advance. Please inform Anatomy IT in time.
Client Installation - Windows
All windows devices managed by the institute have the Citrix Workspace app already installed. This guide explains how to install the Citrix client on a private computer.
- Download the latest Citrix Workspace app setup:
- Citrix Workspace for Windows
- Run the setup file by double clicking the downloaded setup:

Grant administrative rights if prompted:

Once the installation starts, click "Start":

Accept the Licence agreement by marking the checkbox and click "Next":

IMPORTANT: Leave the option "Enable single sign-on" unchecked, and click "Next":

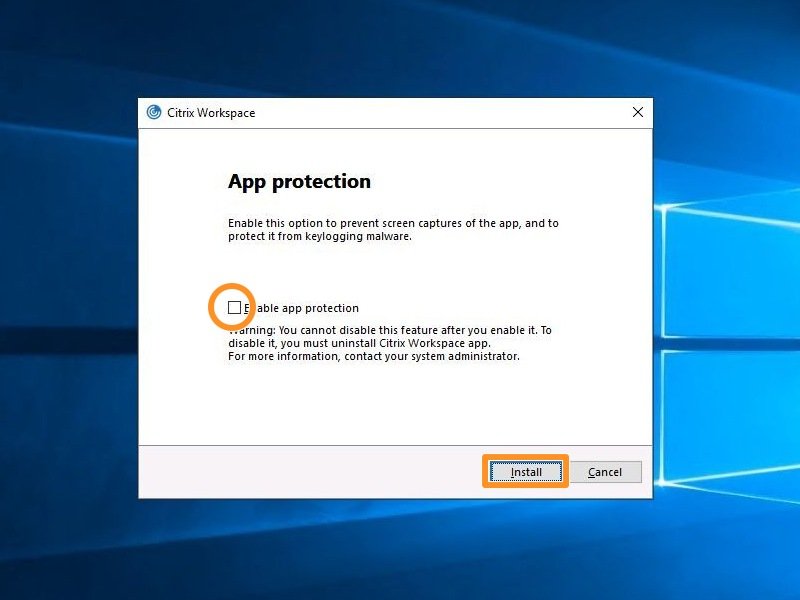
IMPORTANT: Leave the option "Enable app protection" unchecked, and click "Install":
- The installation will start and might take some minutes.
- Once done, you will see a window "Installation successful". Click on "Add Account":

Enter "cx.anatomy.uzh.ch" as server address and click on "Continue".
Please note that entering the anatomy mail address will not work, even if the field asks for mail address or server address. You need to enter "cx.anatomy.uzh.ch".

Enter your Anatomy account credentials again and click on "Log On":

Client Installation - Mac
- Download the latest Citrix Workspace app setup:
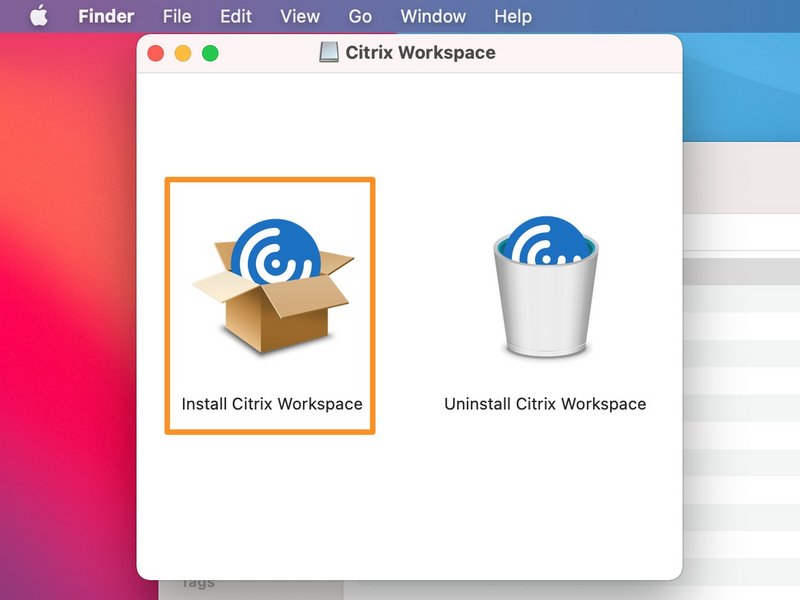
Citrix Workspace for Mac - Run the setup file by double clicking the downloaded setup:

Select "Install Citrix Workspace":
Select "Allow":

Select "Continue":

Select "Continue":

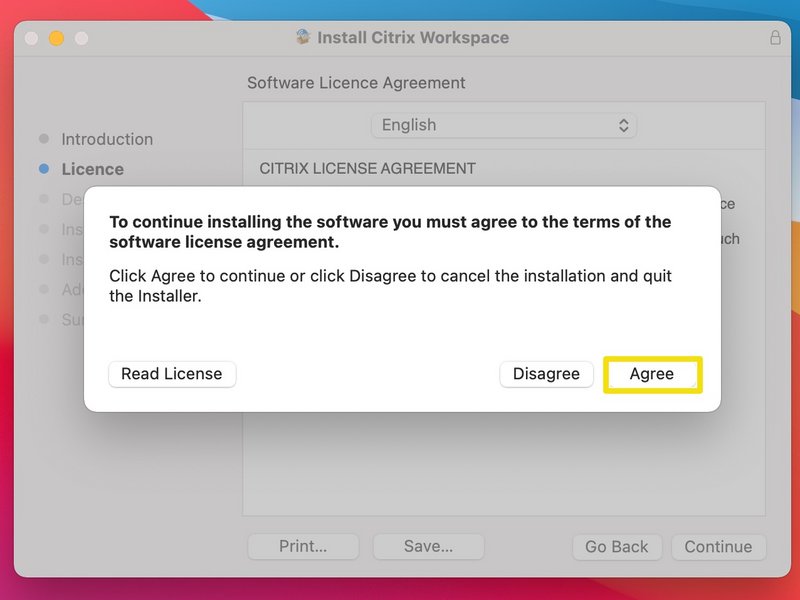
Accept the license agreement by clicking "Agree":
Select "Install":

Enter your Mac admin password to allow the installation and click on "Install Software":

- The installation will start and might take some minutes.
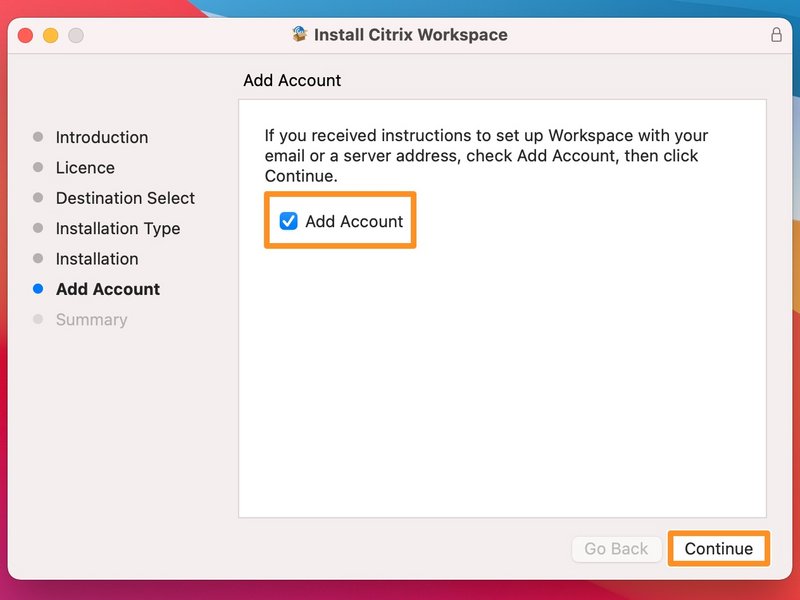
- Enable the checkbox on "Add Account" and click on "Continue":
Click "Close" on "The installation was successful" window:

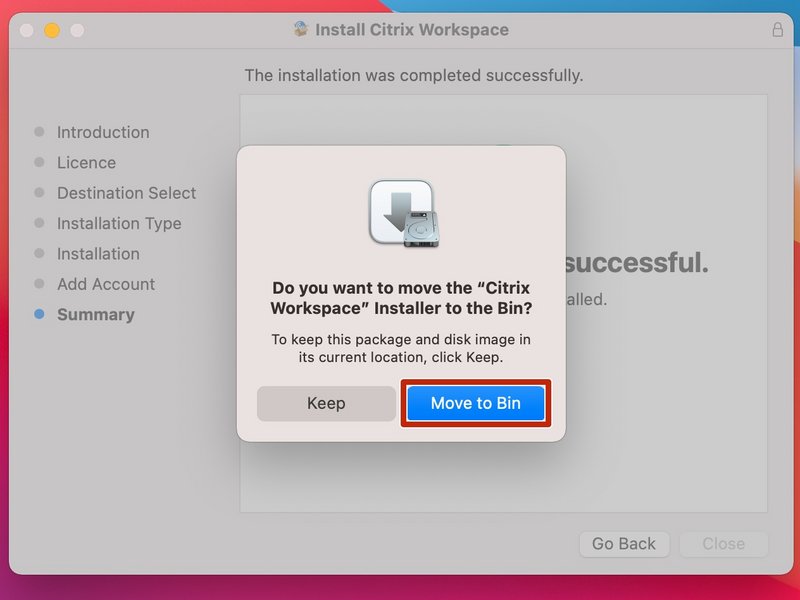
Select "Move to Bin":
Enter "cx.anatomy.uzh.ch" as server address and click on "Next".
Please note that entering the anatomy mail address will not work, even if the field asks for mail address or server address. You need to enter "cx.anatomy.uzh.ch".

Enter your Anatomy account credentials again and click on "Log On":
